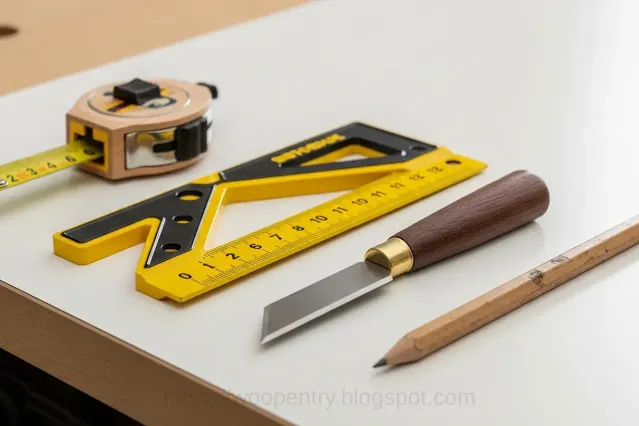
Measuring and Marking Tools Every Beginner Woodworker Needs
 |
| Measuring and Marking Tools Every Beginner |
This guide will introduce you to the essential measuring and marking tools every beginner should own, how to use them effectively, and key tips to improve your precision from the very beginning.
Why Accurate Measuring and Marking Matter
In woodworking, small errors add up fast. A board that’s just 1/16" too long or a hole drilled slightly off-center can ruin the alignment of an entire piece. That’s why investing in the right tools—and learning how to use them properly—is so important.Even with basic hand tools, good measurement and layout practices can elevate your work from “homemade” to “professional.”Must-Have Measuring Tools for Beginners
Tape Measure (25 ft recommended)
The classic go-to tool. A locking 25-foot tape measure with a strong standout (the distance it extends without bending) is ideal for most woodworking tasks.Features to look for:
- Easy-to-read markings (metric and imperial)
- Locking mechanism
- Reinforced hook tip for accuracy
- Always measure twice before cutting.
- Hook the tip properly—don’t press or pull too hard or you’ll distort the reading.
- Use the same tape throughout a project to avoid slight variations.
Steel Ruler (6" and 12")
Unlike plastic or wooden rulers, steel rulers stay straight and resist damage over time. They are ideal for smaller, more precise measurements and planning work.Uses:
- Measuring joinery (like mortises or dados)
- Checking flatness
- Drawing accurate lines along boards
Combination Square
This is one of the most versatile measuring tools in your measuring kit. It allows you to measure and mark 90° and 45° angles, and it includes a built-in ruler.Key Benefits:
- Checks squareness of edges and corners
- Sets blade depth or drill alignment
- Transfers measurements consistently
Speed Square
- A thick triangular tool used to mark straight lines and angles, especially useful when working with dimensional lumber like 2x4s.
- Crosscut marking
- Roof framing angles
- Quick reference for square alignment Pro Tip: Use it as a saw guide for circular saws in straight cuts.
Great For:
Calipers (Optional but Useful)
- Calipers measure internal and external dimensions, and they’re especially helpful for fitting parts together precisely or turning projects on a lathe.
Essential Marking Tools for Woodworkers
Pencil (Preferably Mechanical or Carpenter's Pencil)
A reliable pencil is still a woodworker’s best friend. Mechanical pencils (0.9mm) provide consistent line thickness, while carpenter’s pencils have thicker lead and resist breaking.Tip: Use a sharp pencil for accurate marks, especially when cutting joinery.
Marking Knife
This precision tool scores a very fine line into the wood surface—far more accurate than a pencil. It’s essential for creating crisp layout lines, especially for joinery like dovetails and tenons.Advantages:
- Doesn’t smudge like pencil
- Creates a physical guide for chisels or saws
- Enhances the accuracy of your cuts
Awl or Scratch Awl
Used to mark points or start holes in wood before drilling, reducing bit wandering. Also helpful for laying out fine detail work.How to Use:
- Press gently to make a starter divot
- Use it as a pivot point for compass drawing
Marking Gauge
This tool scores a parallel line from an edge, often used in joinery for mortise and tenon or groove layout. It ensures consistent spacing and accuracy that’s hard to get freehand.Bonus Tools for Better Accuracy
Bevel Gauge (Sliding T-Bevel):
- Transports angles from one piece to another—great for duplicating non-standard angles.
Digital Angle Finder:
- Helps you find and replicate exact angles, especially useful for compound cuts and miter work.
Framing Square:
- Larger than a combination square, useful for laying out large panels and checking right angles in furniture frames.
Measurement Best Practices for Beginners
Here are a few essential habits that will make your woodworking more precise and enjoyable:Always Use the Same Tool Throughout a Project
Using different tape measures or rulers can introduce small variations. Stick with one to maintain consistency.Measure Twice, Cut Once
Classic advice, but still relevant. Taking an extra moment can save hours of rework.Mark the Waste Side
Always indicate which side of the line you’re cutting on—especially when working with tight tolerances.Keep Your Tools Sharp and Clean
Blunt marking knives or gummed-up tape can distort your results.Use Light to Your Advantage
Work in a well-lit area, and tilt your head to cast shadows over pencil lines when needed for clarity.Simple Beginner Projects to Practice Measuring and Marking
Here are some beginner-friendly projects to help you apply your measuring and marking skills:- Simple Bookshelf: Practice using a square and tape measure.
- Tool Caddy: Great for marking drill holes and angles.
- Picture Frame: Teaches precision with 45° angles.
- Cutting Board: Emphasizes layout planning and marking symmetry.
Final Thoughts
Your measuring and marking tools are like the compass and map of your woodworking journey. They may not make dramatic cuts or loud noises, but they’re the quiet heroes that guide every success.By mastering these tools early on, you’ll save time, money, and frustration—while developing habits that will serve you for a lifetime of woodworking.
As with all tools: Start simple, learn the basics, and upgrade as your skills grow.

